JW884
Well-known member
- Likes
- 244
- Location
- Connecticut
TLDR; Ram Promaster 2500 136” DIY build with electric bed lift, lots of USB and 120v outlets, fits 3 big bikes, and is pretty stealthy.
So I haven’t fully documented my van build anywhere except some pictures along the way so I figured I’ll give the whole rundown here if anyone cares to read and maybe learn from it (and I’ll add pictures with my Alta when I get it next week)(I realized it was mainly videos showing progress as I'm compiling them so sorry if the photos skip around a a bit; may add videos later on) buckle in!
So early 2018 I bought a E350 van to build into a simple motovan because sleeping in a tent at the track in the cold and rain was getting pretty old. I had it a few months and got some stuff done to it but when I brought it to a mechanic I was told there was a good part of the inner frame rail rotted out and it was unsafe to drive learned my lesson about buying anything at night (we couldn’t crawl all the way under but everything else underneath seemed good)
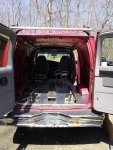
By the end of 2018 I gave in and sold (scrapped) the E350 and bought a new Promaster 2500 136” high roof. I bought a 136” because it’s nice to be able to park it in a normal parking spot and I share it daily driving with my 944, so I didn’t want it to be a pain. Being able to fully stand up in it was a huge difference that I wouldn’t be able to switch back to a lower van. I brought it on a Friday night, and went to race the Albany Kicker AX that Saturday. Ended up getting taken out in a heat, won the LCQ, and qualified straight in from the other heat. Got a 2nd and a 5th in the mains in front of a big crowd so safe to say it was a good start for the van.
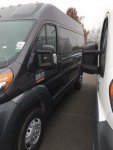 http://instagr.am/p/BqWR3sZF1ji/
I waited until about February to start building it out since it was just too cold in the winter to do anything in there. I researched a lot during this time and learned a lot from how people build theirs out in the vanlife community and took some ideas from them and added a lot of my own. From February-April I did 80% of the build and the other 20% was over the next year and a half I added small things to help make things easier and more comfortable. I started by rolling on a bunch of the sound deadening sheets (Kilmat) to the walls, floor, and some of the ceiling. Then I made a ½” plywood floor (that was sealed to help longevity) Then I cut squares of an old tarp and placed them under all the D-rings and stapled them to the wood to help catch any dirt that falls into them (you can see the blue tarp in the next photo). Then I placed the rubber mat that was included on the floor.
Next I glued 1” thick panels of rigid PolyIso foam insulation to the walls and ½” to the ceiling. I left the main support beams open to help run wiring and leave holes to hook tie downs to. Then I used 1x3s for studs and spaced them about 12" to which everything on the walls mount to. Then I ran all my wiring for my 12v and 120v before I did the wall panels. The wall panels were ¼” plywood (since it’s light and can bend to the shape of the vans walls). I glued and stapled Indoor/Outdoor “speaker carpet” to the panels, added the outlets, and put them up. I screwed them into the studs which helps so I can always find the studs by looking for the screws.


I installed 2 Rocky Mountain removable wheel chocks because they were a good price (About $30-35 each) and I planned to use the van for camping and other things that may not always involve bikes. When removed, you’d have a hard time trying to stub a toe on the small lip that the chock slides into. I can fit three big bikes by putting the third bike in backwards in-between the other two. To install them, I measured quite a few times to make sure I had enough room all around, then drilled two holes for each mount. When the bolts were tightened, I sprayed Ryno Liner on the underside to prevent any rust.
Next step was the electrical box. Framed out of 2x4s, it housed 2 100aH Deep-cycle AGM batteries, a 1500w pure sine inverter, a 12v fuse box, and a voltage regulating diode to charge the batteries from the van’s battery. I went with those AGM batteries because it was the most budget-friendly option and it had enough amp hours to run all the stuff I wanted at the time, but sadly isn’t enough for the Alta so I may need to upgrade in the future lol. The inverter was the best choice for my case since I have 3 120v outlets and wanted them all separate on the inverter (and again, maybe upgrade in the future for the bike). The diode is setup to charge the batteries when the van is running but will shutoff and won’t kill the starting battery while using the Deep-cycle batteries. I have 6 2.1A USB ports (2 for the RBG LED strips), 2 3A USB ports (1 for the Raspberry Pi), and a 12v cigar plug (for the TV/shower head). The two USB ports on the headboard also have a voltage monitor so I can keep an eye on it, even when I can’t see the one on the battery box.
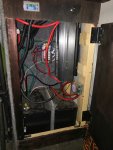
After the battery box, I measured out the space and made one large frame out of 2x4s with two large cabinets and two counters at different heights. I made the taller counter to have the bed rest on that, and to have more storage space inside of it. That side holds all my spare gear, some bike parts, triangle stand, 12v shower head, grill, a 6-gal water jug. The other side holds 2 more jugs, all my camping and cooking supplies. Both this and the battery box have ¼” plywood walls with the carpet, ½” countertop and doors that are matching dark stains. The space between the two is the perfect size for my easy up, outdoor rug, two camping chairs, and some umbrellas.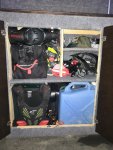
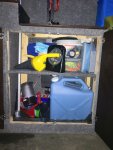

After those cabinets, I went to Lowe’s and bought one of the discounted cabinets they have, cut the back of if to contour to the van’s walls, and hung it above the electrical box. Added a shelf in the middle of it and it has a lip on the top of it which acts as another shelf. The color was close to the stain I used which was nice, so I didn’t have to change that. This cabinet usually houses the Xbox, games, controllers on the bottom with snacks, and odds & ends on the top shelf. Later, I added pinch & roller latches and matching handles to all the doors, so I no longer had to use the child locks you’ll see on many of the photos.
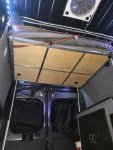
The bed was a very important part that I was trying to plan from the beginning. It had to be small enough to get it out of the way, and strong/comfortable enough for my girlfriend and I to sleep on it for multiple nights in a row. It took a good amount of measuring since the ceiling isn’t as wide as lower parts of the walls. It’s an angled aluminum frame with cross supports that my dad and I welded together with a ½” plywood layer bolted to it. I have a 3” mattress topper on it and it’s enough to be comfortable, but not too tall to the point you feel cramped against the ceiling. It’s fairly lightweight so it was easy to raise and lower the original way, which was by lifting it into place and securing it to the ceiling with two tie downs. There is still plenty of room to walk under the bed when it is raised so it’s not a hassle. On the opposing side of the large cabinet is a 2x4 support I made to have the bed rest on so it’s level and sits perfectly above the two bikes in their chocks. The bars fit very snug on the right chock bike but works well. I have two latches that keep the bed from moving out of place when it is lowered. Ever since the bed was done, I’ve been trying different ways to raise and lower it easier and have tried pulleys, a winch, and pneumatic struts but I finally got it dialed in about 2 months ago. I have 3 electrical linear actuators that all are in parallel and raise and lower on one DPDT (Double Pole Double Throw) center off switch. It took a few test runs, and I had to cut a good amount out of the middle of the large cabinet to fit one of the actuators, but it was well worth it.


The TV is a 24” 12v/120v, but I have it running on the 12v cigar plug. It’s mounted on a swivel mount next to the upper cabinet, so it angles great at the bed or outside the slider door. I have a Raspberry Pi 3B+ mounted on the side of the cabinet with 1/2TB of movies, shows, and games. It runs Retropie (Version of their OS for emulators) and can run games from Atari & NES to PS1 & PSP. The LED strip remote and TV remote are attached to the cabinet with Velcro but can stick to the walls if you want it by the headboard or anywhere else in the van and it’s super handy. The Xbox sits in the upper cabinet, but has a hole in the cabinet to run the power, HDMI, and controller cables to clean up the area when it’s plugged in.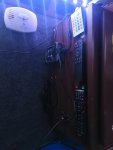

Other things I’ve done:
The roof vent was the scariest part, but it went smoothly and isn’t hard as long as you have patience and are careful. It helps so much if you crack the rear door open and it can pull a draft through nicely.

The overcab shelf I use to hold my pitboard, sleeping bags, extra blankets, pillows, and sweatshirts.
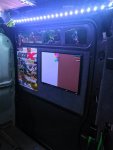
Added some of my favorite racing photos (form the one and only Paul Buckley) and a 1/2 whiteboard, 1/2 corkboard on the slider door for some decor. The whiteboard is used to write my racing schedule and track laptimes at tracks. The cork board is filled with Polaroids of my friends, family, and more. Also sticker bombed the upper cabinet doors with all my sponsor and favorite moto brands. The inside of the door has all my favorite bands' stickers. The other door has mini plates of mine and some friends.

I have a roll-up travel bag that houses all my toiletries and hangs by a hook near the slider door.
I made probably the cheapest blackout curtains for the rear windows and the partition slider window . (Pictured above in the picture with the bed from underneath) I glued two blackout curtains back to back with thin plywood in the corners, and Velcro stapled to the plywood. They Velcro right in place and block all light going in or out. The only possible “not stealth” thing on the van is the roof vent. I’m paranoid from knowing many people that have had bikes stolen so I try to advertise the bikes the least possible haha (and more privacy is always nice).
I have a 12v shower head that pulls water from a 5-gal bucket and mounts to the rear door. Still trying to figure this one out better since it seems to leak and might need a better solution haha.
My oil shelf built into the bed support holds all my bike oils, cleaners, a fire extinguisher, and any other sprays and bottles.The gas can bungees in an opening near the rear right door. I’ll have to figure out a generator situation soon to see what works before I head to races with it as my main bike.

The toolbox, tire pump, folding table, air filter cleaner (won’t be needing that much soon haha), and bag of odds & ends are all neatly tucked between the back left door and the cabinets.
Things I look to do in the future:
I have a homemade sink setup but want to find the right water tanks so I can mount them well underneath the van. Already have a cool 5v rechargeable battery powered faucet to go with it.
Plan on making a doorway or some way to get through the partition but has to wait because my front passenger seat is a double bench, so I’d like to have the backrest of the middle seat cut and re-upholstered first before moving on.
Also would like to add an awning of some sort, maybe a roof rack and solar in the future but not in a rush on that.


If you made it this far thanks for reading! It was a really fun (and clearly very DIY ) project and works great for my needs and anyone that has one know that it’s never truly done and little things will continue to be added or changed. I plan on eventually doing a full tour video and put it on my Youtube Channel. If anyone wants links to things I’ve mentioned in here I can try to find them. And I can help with advice if anyone is looking to build one. I’ll add photos with my Alta soon.
So I haven’t fully documented my van build anywhere except some pictures along the way so I figured I’ll give the whole rundown here if anyone cares to read and maybe learn from it (and I’ll add pictures with my Alta when I get it next week)(I realized it was mainly videos showing progress as I'm compiling them so sorry if the photos skip around a a bit; may add videos later on) buckle in!
So early 2018 I bought a E350 van to build into a simple motovan because sleeping in a tent at the track in the cold and rain was getting pretty old. I had it a few months and got some stuff done to it but when I brought it to a mechanic I was told there was a good part of the inner frame rail rotted out and it was unsafe to drive

By the end of 2018 I gave in and sold (scrapped) the E350 and bought a new Promaster 2500 136” high roof. I bought a 136” because it’s nice to be able to park it in a normal parking spot and I share it daily driving with my 944, so I didn’t want it to be a pain. Being able to fully stand up in it was a huge difference that I wouldn’t be able to switch back to a lower van. I brought it on a Friday night, and went to race the Albany Kicker AX that Saturday. Ended up getting taken out in a heat, won the LCQ, and qualified straight in from the other heat. Got a 2nd and a 5th in the mains in front of a big crowd
 http://instagr.am/p/BqWR3sZF1ji/
I waited until about February to start building it out since it was just too cold in the winter to do anything in there. I researched a lot during this time and learned a lot from how people build theirs out in the vanlife community and took some ideas from them and added a lot of my own. From February-April I did 80% of the build and the other 20% was over the next year and a half I added small things to help make things easier and more comfortable. I started by rolling on a bunch of the sound deadening sheets (Kilmat) to the walls, floor, and some of the ceiling. Then I made a ½” plywood floor (that was sealed to help longevity) Then I cut squares of an old tarp and placed them under all the D-rings and stapled them to the wood to help catch any dirt that falls into them (you can see the blue tarp in the next photo). Then I placed the rubber mat that was included on the floor.
http://instagr.am/p/BqWR3sZF1ji/
I waited until about February to start building it out since it was just too cold in the winter to do anything in there. I researched a lot during this time and learned a lot from how people build theirs out in the vanlife community and took some ideas from them and added a lot of my own. From February-April I did 80% of the build and the other 20% was over the next year and a half I added small things to help make things easier and more comfortable. I started by rolling on a bunch of the sound deadening sheets (Kilmat) to the walls, floor, and some of the ceiling. Then I made a ½” plywood floor (that was sealed to help longevity) Then I cut squares of an old tarp and placed them under all the D-rings and stapled them to the wood to help catch any dirt that falls into them (you can see the blue tarp in the next photo). Then I placed the rubber mat that was included on the floor.Next I glued 1” thick panels of rigid PolyIso foam insulation to the walls and ½” to the ceiling. I left the main support beams open to help run wiring and leave holes to hook tie downs to. Then I used 1x3s for studs and spaced them about 12" to which everything on the walls mount to. Then I ran all my wiring for my 12v and 120v before I did the wall panels. The wall panels were ¼” plywood (since it’s light and can bend to the shape of the vans walls). I glued and stapled Indoor/Outdoor “speaker carpet” to the panels, added the outlets, and put them up. I screwed them into the studs which helps so I can always find the studs by looking for the screws.


I installed 2 Rocky Mountain removable wheel chocks because they were a good price (About $30-35 each) and I planned to use the van for camping and other things that may not always involve bikes. When removed, you’d have a hard time trying to stub a toe on the small lip that the chock slides into. I can fit three big bikes by putting the third bike in backwards in-between the other two. To install them, I measured quite a few times to make sure I had enough room all around, then drilled two holes for each mount. When the bolts were tightened, I sprayed Ryno Liner on the underside to prevent any rust.
Next step was the electrical box. Framed out of 2x4s, it housed 2 100aH Deep-cycle AGM batteries, a 1500w pure sine inverter, a 12v fuse box, and a voltage regulating diode to charge the batteries from the van’s battery. I went with those AGM batteries because it was the most budget-friendly option and it had enough amp hours to run all the stuff I wanted at the time, but sadly isn’t enough for the Alta so I may need to upgrade in the future lol. The inverter was the best choice for my case since I have 3 120v outlets and wanted them all separate on the inverter (and again, maybe upgrade in the future for the bike). The diode is setup to charge the batteries when the van is running but will shutoff and won’t kill the starting battery while using the Deep-cycle batteries. I have 6 2.1A USB ports (2 for the RBG LED strips), 2 3A USB ports (1 for the Raspberry Pi), and a 12v cigar plug (for the TV/shower head). The two USB ports on the headboard also have a voltage monitor so I can keep an eye on it, even when I can’t see the one on the battery box.

After the battery box, I measured out the space and made one large frame out of 2x4s with two large cabinets and two counters at different heights. I made the taller counter to have the bed rest on that, and to have more storage space inside of it. That side holds all my spare gear, some bike parts, triangle stand, 12v shower head, grill, a 6-gal water jug. The other side holds 2 more jugs, all my camping and cooking supplies. Both this and the battery box have ¼” plywood walls with the carpet, ½” countertop and doors that are matching dark stains. The space between the two is the perfect size for my easy up, outdoor rug, two camping chairs, and some umbrellas.


After those cabinets, I went to Lowe’s and bought one of the discounted cabinets they have, cut the back of if to contour to the van’s walls, and hung it above the electrical box. Added a shelf in the middle of it and it has a lip on the top of it which acts as another shelf. The color was close to the stain I used which was nice, so I didn’t have to change that. This cabinet usually houses the Xbox, games, controllers on the bottom with snacks, and odds & ends on the top shelf. Later, I added pinch & roller latches and matching handles to all the doors, so I no longer had to use the child locks you’ll see on many of the photos.
The bed was a very important part that I was trying to plan from the beginning. It had to be small enough to get it out of the way, and strong/comfortable enough for my girlfriend and I to sleep on it for multiple nights in a row. It took a good amount of measuring since the ceiling isn’t as wide as lower parts of the walls. It’s an angled aluminum frame with cross supports that my dad and I welded together with a ½” plywood layer bolted to it. I have a 3” mattress topper on it and it’s enough to be comfortable, but not too tall to the point you feel cramped against the ceiling. It’s fairly lightweight so it was easy to raise and lower the original way, which was by lifting it into place and securing it to the ceiling with two tie downs. There is still plenty of room to walk under the bed when it is raised so it’s not a hassle. On the opposing side of the large cabinet is a 2x4 support I made to have the bed rest on so it’s level and sits perfectly above the two bikes in their chocks. The bars fit very snug on the right chock bike but works well. I have two latches that keep the bed from moving out of place when it is lowered. Ever since the bed was done, I’ve been trying different ways to raise and lower it easier and have tried pulleys, a winch, and pneumatic struts but I finally got it dialed in about 2 months ago. I have 3 electrical linear actuators that all are in parallel and raise and lower on one DPDT (Double Pole Double Throw) center off switch. It took a few test runs, and I had to cut a good amount out of the middle of the large cabinet to fit one of the actuators, but it was well worth it.


The TV is a 24” 12v/120v, but I have it running on the 12v cigar plug. It’s mounted on a swivel mount next to the upper cabinet, so it angles great at the bed or outside the slider door. I have a Raspberry Pi 3B+ mounted on the side of the cabinet with 1/2TB of movies, shows, and games. It runs Retropie (Version of their OS for emulators) and can run games from Atari & NES to PS1 & PSP. The LED strip remote and TV remote are attached to the cabinet with Velcro but can stick to the walls if you want it by the headboard or anywhere else in the van and it’s super handy. The Xbox sits in the upper cabinet, but has a hole in the cabinet to run the power, HDMI, and controller cables to clean up the area when it’s plugged in.


Other things I’ve done:
The roof vent was the scariest part, but it went smoothly and isn’t hard as long as you have patience and are careful. It helps so much if you crack the rear door open and it can pull a draft through nicely.

The overcab shelf I use to hold my pitboard, sleeping bags, extra blankets, pillows, and sweatshirts.
Added some of my favorite racing photos (form the one and only Paul Buckley) and a 1/2 whiteboard, 1/2 corkboard on the slider door for some decor. The whiteboard is used to write my racing schedule and track laptimes at tracks. The cork board is filled with Polaroids of my friends, family, and more. Also sticker bombed the upper cabinet doors with all my sponsor and favorite moto brands. The inside of the door has all my favorite bands' stickers. The other door has mini plates of mine and some friends.


I have a roll-up travel bag that houses all my toiletries and hangs by a hook near the slider door.
I made probably the cheapest blackout curtains for the rear windows and the partition slider window
I have a 12v shower head that pulls water from a 5-gal bucket and mounts to the rear door. Still trying to figure this one out better since it seems to leak and might need a better solution haha.
My oil shelf built into the bed support holds all my bike oils, cleaners, a fire extinguisher, and any other sprays and bottles.The gas can bungees in an opening near the rear right door. I’ll have to figure out a generator situation soon to see what works before I head to races with it as my main bike.

The toolbox, tire pump, folding table, air filter cleaner (won’t be needing that much soon haha), and bag of odds & ends are all neatly tucked between the back left door and the cabinets.
Things I look to do in the future:
I have a homemade sink setup but want to find the right water tanks so I can mount them well underneath the van. Already have a cool 5v rechargeable battery powered faucet to go with it.
Plan on making a doorway or some way to get through the partition but has to wait because my front passenger seat is a double bench, so I’d like to have the backrest of the middle seat cut and re-upholstered first before moving on.
Also would like to add an awning of some sort, maybe a roof rack and solar in the future but not in a rush on that.


If you made it this far thanks for reading! It was a really fun (and clearly very DIY

